Monday, November 30, 2009

Herbed Ritz Bits Crackers…

BPD_09Friends and family absolutely rave over these yummy crackers! They have become a holiday favorite.   You’ll be surprised that they do not get soggy after marinating so long. They are crispy as well as tasty!
pa1b25_herbed_cheese_crackers1_lg
Ritzy Ritz Bits
2 (10 1/2-ounce) boxes Ritz Cheese Bits, not peanut butter flavor
1/3 cup vegetable oil
1 (1-ounce) package ranch salad dressing mix
1 teaspoon garlic powder
Place the crackers in a large sealable freezer container. In a bowl, mix the oil, salad dressing mix and garlic powder. Pour this mixture over the crackers, cover the container, and gently invert it to coat the crackers with seasoning. Refrigerate for at least 24 hours, turning the container every so often to keep the crackers coated. Let the mixture come to room temperature before serving. Store in the covered container in refrigerator.
Posted  to Bloggy Progressive Dinner appetizers at  Balancing Beauty and Bedlam  and Tempt My Tummy Tuesday

Birthday Eggnog

BPD_09
My sons’ birthdays are on consecutive days, 8 days before Christmas.  They are 6 hours from being exactly 10 years apart and have always celebrated their birthdays together, usually on the youngest son’s birthday, as his comes first :)   So far, they have celebrated 14 birthdays together and treasure each one.  Because their birthdays are so close to Christmas, they have a special menu for their dinner.  Every item on the menu is only made once a year, for their birthday.  And always this must include birthday eggnog. 
Here are the imps at their last birthday: 
BG1 
This recipe originally came from Parents magazine.  A long time ago in a galaxy far, far away, as evidenced by the fact that it contains raw eggs.  The recipe simply advised to use very fresh eggs and we’ve been making it this way for more than 20 years with absolutely no ill effects.  But use your discretion, if this is a concern for you. 
Fair warning.  Once you try this light and delicious beverage, you’ll never be able to drink the icky thick stuff from the supermarket again.  Ever.
Birthday Eggnog
6 large eggs, separated
3/4 cup sugar
2 quarts (8 cups) milk
1/2 gallon vanilla ice cream, softened & cut into 1 inch cubes
1/8 teaspoon ground nutmeg
Beat egg whites until stiff peaks form.  Transfer to another bowl.  Beat egg yolks and sugar until thick and pale yellow, about 3-5 minutes.  Gradually stir in milk, add ice cream and stir until completely blended.  Fold in egg whites and sprinkle with nutmeg.  Keep refrigerated and serve cold. 

308031776_9507b6452d

Mmm.  Creamy and delightful. 


Visit JessieLeigh at Parenting the Tiniest of Miracles for more delicious progressive dinner beverages.

Thursday, November 26, 2009

BLaCK FRiDaY SPeCiALs


Black Friday through Monday Everything in PrairieCottageRose and puddintoes is 15% off! 
Prices will already be adjusted so you can just purchase and go…. No code and no looking for a refund!
Check out the team blog for specials and more by my teammates or just type sheteam into the search field on Etsy. 
Thank you and you may now return to your regularly scheduled festivities :)


MERRY CHRISTMAS!

Wednesday, November 25, 2009

Happy Thanksgiving

My soul will be satisfied as with the richest of foods; with singing lips my mouth will praise you.
Psalm 63:5

Monday, November 23, 2009

Lemon Poppy Seed Bread

In case you get tired of pumpkin… here’s something yummy.  And it happens to be easy peasy lemon squeezy.
3534815056_fd8d0800d3 
LEMON POPPY SEED BREAD
1 lemon or yellow cake mix
1 package (3 oz) instant lemon pudding mix
4 eggs
1 cup water
1/2 cup vegetable oil
1-2 tablespoons poppy seeds 
3 tablespoons flour 

Throw it all in a bowl.  Beat with a mixer for 3 minutes.  Bake @ 350 in 2 loaf pans or 1 Bundt pan 40-50 minutes, until a toothpick inserted in the center comes out cleanly.
Variations: 
Chocolate Poppy Seed Cake: Substitute c
hocolate cake mix and chocolate instant pudding. 
Almond Vanilla Poppy Seed Cake: Substitute white cake mix, vanilla instant pudding and add 1 teaspoon almond extract. 
See? Nothing to it.  Be sure to freeze some slices for your holiday trays. 

Sunday, November 22, 2009

Not enough hours…

in my days lately.  I’m sure you know the feeling. 
Desperately trying to keep up with homeschool, work and a few special requests for my Etsy shop. 
Here are the newest items in PrairieCottageRose: 
November 075 Crocheted cotton spa set and handmade soap in a vintage carved and lined box.  I’m really loving this box.  A lot. 
November9 055
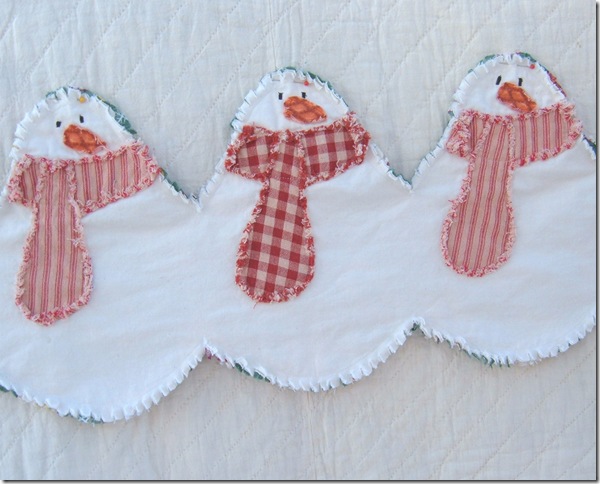
Snowman table  runner with red scarves.  I’m so happy with how they turned out.  This is a close up of 2 snowmen, but there are 5  of them, cut paper doll style in this runner. 
November9 068
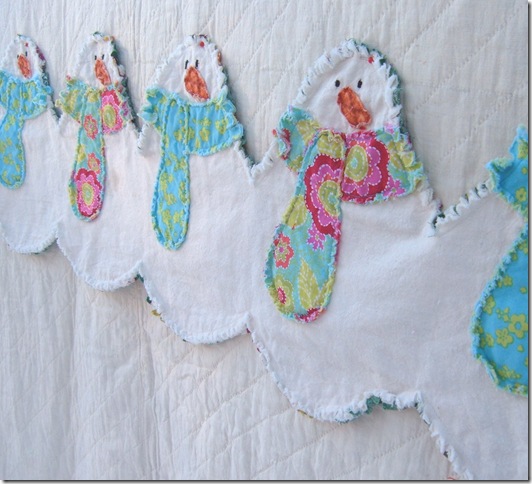
This one is my absolute favorite.  I love the colors… not just for Christmas, but for the snowy winter months, too.  It is already on the way to its new home. Yay!
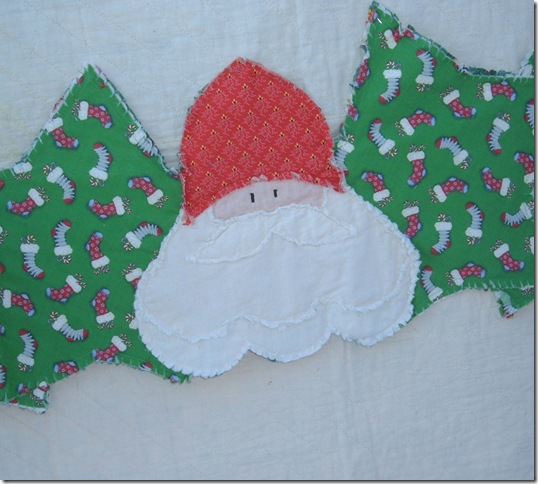
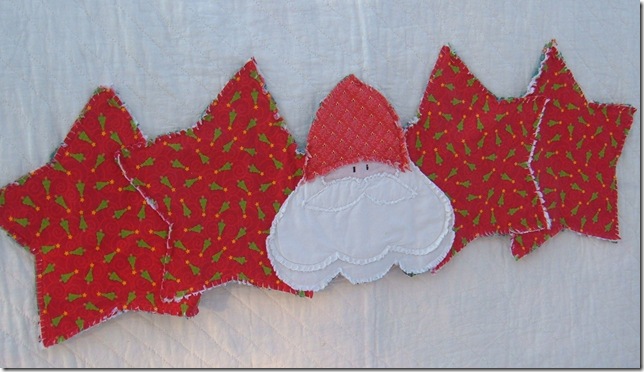
November9 076 November9 085 SaNTa table runners in green and red. 
November9 109
November9 099 Santa coffee cozies in red or green. 
Up next:  Baby Jesus table runners, a special suggestion from a sweet and patient buyer in AuSTRaLiA!
So how’s your Monday starting so far?

Wednesday, November 18, 2009

Recycled Shipping Boxes


I first saw this tip on the Carol Duvall show. (I love her)!   It’s very frugal and a great way to upcycle.   I used cereal boxes to demonstrate, but this method works for any size box.   
October 005

Here’s what you’ll need: 
Clean used boxes.
White or craft glue.
Clamps or clothespins.

  October 006
Step 1:  Find the flap on the inside where they seamed the box together.  Slide your finger or a letter opener along the seam to open the box.


October 007


Step 2:  At each of the previous folds in the box, refold and crease it in the opposite direction. 


October 008

 Spread glue on the original seam of the box.  Don’t worry if it looks messy.  The flap will cover it :)


October 011
Fold the flap to cover the glue and use your clamps or clothespins to hold it until the glue dries.  I have a stack in the background already glued and finished. 
Pop it back into a box shape and refold the tabs. Voila! The outside now looks like a brand new box and the the pretty graphics are on the inside.  Cereal and cracker boxes are perfect for small items or photos that normally would be shipped in a manila envelope. The cardboard is much sturdier in the mail.  Use the same steps are for any size of box.   
Now go forth and upcycle your boxes this Christmas!
Find more tips and ideas at Works For Me Wednesday

Thursday, November 12, 2009

Welcome Back, Cody

A big, heartfelt thanks to all of you who have been faithfully praying for my son-in-law, daughter, and grandbabies while Cody was deployed in Iraq this past year!!  He arrived back home on Tuesday, safe and sound.   

In honor of his return, I’m reposting this short video of him playing with the cutest Iraqi kids ever.  It’s amazing how kids are alike the world over, despite language and culture differences!

Tuesday, November 10, 2009

The 50 pound potato plan

potatoes

Recently, when I was in our local supermarket, I stumbled on a potato sale.  It was totally an accident.  There I was.  And there they were.  10 pounds of beautiful potatoes for 99 cents.  For the whole 10 pound bag. 

You can imagine my delight.

I bought 5.  As in 50 pounds.  Yup. Five-zero glorious pounds of potatoes.  For my little family of 3.

I would have gotten more, but 5 was the limit.  Silly supermarket.

Before you lump me in with the rest of the criminally insane, let me say 3 little words: batch freezer cooking.  

It’s my secret fast and frugal weapon and one of my favorite sessions to do is a potato session.  I never buy potatoes unless they’re on sale and I never have to deal with them slowly decaying because I can’t deal with them fast enough. 

Please don’t assume you can’t freeze potatoes.  While you can’t successfully freeze them raw, they will freeze beautifully partially cooked and you’ll quickly find them the easiest and most versatile item in your freezer cooking repertoire. 

You don’t have to follow my plan exactly.  This is just a basic sketch of what can be done.  Go ahead and use your own personal and family favorites using these guidelines, multiplying your recipes to use 5-10-20-or more pounds of potatoes :)

First, I made 20 pounds into JW potatoes.  I’ve posted this recipe before and you can find it here.  This time, I made some with just cheese and bacon and some with just cheese and broccoli, to use more as a side dish than a main dish.  

Next, 20 pounds became Make Ahead Mashed Potatoes (Recipe below).

mpot1 I freeze them in zipper bags, flat on a cookie sheet.  When they are frozen solid, they stack like pretty little potato books in the freezer.  Use ginormous or small zipper bags, according to the servings your family normally uses.

262581299_74ced06b34

The last 10 pounds became steak fries.  Scrub potatoes and cut each into lengthwise wedges. Toss with melted butter or olive oil.  Not a lot. Just enough to coat, about 2 tablespoons per 3-4 pounds of potatoes. Add seasonings until coated.  I use salt, pepper and paprika.  Ranch dressing mix is good too. Use your favorites.   Spray a cookie tray with non-stick spray and arrange wedges in a single layer.  Bake 20 minutes at 400 degrees.  Cool and then flash freeze on a cookie sheet.  Remove when frozen and keep in zipper bags in the freezer.  When ready for some fries, remove desired amount from the freezer and bake again at 400 degrees, 20-30 minutes or until desired crispness.

So that’s about all. Lots of ways to vary and add to it, but this is the basic potato plan.

Make Ahead Mashed Potatoes
3 lbs potatoes
2 tablespoons butter or margarine 
3 ounces cream cheese, softened
2/3 cup sour cream
1/4 cup milk
3/4 teaspoon salt

1.  Peel and chunk potatoes and place in a saucepan; add water to cover. Bring to a boil and simmer for 25 minutes or until potatoes are tender.
2.  Drain well.
3.  Place in a large mixing bowl and use mixer or potato masher to mash them 
4.  Add  butter, cream cheese, sour cream, milk and 3/4 teaspoon salt.
5.  Mix until all ingredients are blended.
6.  If using now:  Spoon mixture into a lightly greased baking dish.  Bake @ 350 for 30 minutes, until hot.
7.  If freezing:  Cool.  Spoon into zipper bags.  Seal and use your hands to smoosh the potatoes and make the bags flat.  Freeze.  Remove from tray when frozen and stack. 
8.  To cook from freezer:  Remove bag(s) from freezer and thaw overnight in refrigerator.  Place in lightly greased baking dish and bake as above.    

Please visit Tasty Tuesday and Tempt My Tummy Tuesday for lots more great recipes!

Wednesday, November 4, 2009

Soap at your doorstep. Every month for a year. And you could win it!!

handmade soap by deshawn marie packaging
Soap maker DeShawn Marie is giving away a year’s worth of free soap! It’s a great deal and for only $6.75 per month, you can subscribe to DeShawn’s monthly Soap Club. and have a fabulous bar of soap delivered to you every month.  For a whole year!
Perfect Rose Vegan Handmade Soap by DeShawn Marie (3)

But, here’s the best part: you can also enter to win a subscription to the Soap Club. Check out all the details on DeShawn’s blog.  Here’s just 1 of the gazillion she has available: 

Don’t you just have to have it?

Tuesday, November 3, 2009

Candy Corn Cookies

We tried something new this fall with Grammy Snelling’s sugar cookie dough.  Candy Corn Cookies.  No real candy corn is involved :)  They were easy and turned out so cute!
Use your favorite sugar cookie dough.  Then divide it into 3 portions, the orange and yellow portions are a little larger than the white one.  Then use gel food coloring to make the orange and yellow sections, leaving the smaller portion plain. 
They look suspiciously like play dough at this point!
November 054 
Fold a piece of wax paper or parchment paper so that it fits in a loaf pan.  Smoosh the dough into the loaf pan… orange first, then yellow and finally the plain sugar dough.  It doesn’t have to be perfect, just get your layers in there: 
November 057
Refrigerate for 1 hour or until dough is thoroughly chilled and firm.  Remove and use the wax paper to help coax the dough loaf out of the pan. 
November 060
Start slicing the dough into thin slices: 
November 062
Then cut each slice into little triangles.  Now you can see the little “candy corn.”  Dust with sprinkles or sugar and bake per your recipe’s instructions. 
November 063
Aww.  They’s so cute! 
Linking to: 
Tempt my Tummy Tuesdays Join  us 

Saturdays at tatertotsandjello.com for the weekend wrap up         party!TastyTuesday200pix

Sunday, November 1, 2009

The Season to Prepare

October 144
Pictured above are hand crocheted Christmas stockings from my Etsy shop.  Of course, the baby Jesus stocking is my favorite.  I made stockings like these for each of my babies on their first Christmas.  They have lasted for 25 years and counting and always bring me lots of compliments. 
Every year at this time I am busy, busy, busy preparing for the hectic Christmas season. So busy I barely have time to prepare for our own Christmas. This is the time of year when I am making, listing and packaging day and night.  Sleep? Not much, thank you.  I have creations that need to be in someone's stocking or under their Christmas tree this year.
This week, in addition to the stockings, I’ve been making more scarves and neck warmers for Prairiecottagerose.  Cold weather is already well established at the prairie cottage and will soon be make its way to where you are:
parasolcraft 100
In an effort to use up all of my yarn before buying more, I’ve also been making reusable coffee sleeves.  An easy way to go green or slip one on a cup and include a little gift card for a fast and easy gift for neighbors and teachers:  
coffee sleeves
Look at the latest adorable baby shoes I made for puddintoes
babyshoes
Of late, there has been a movement to support handmade and the little people like me. When selecting your holiday gifts this season remember all of us who prepared and worked the whole  year long to bring our creations to you. We don't crank these out in huge factories with the latest machines and technology.  They come from our hearts and our genuine love of creating.  Always with a smile, knowing someone is truly going to appreciate receiving our handmade gift this year.
The process of designing a new creation and making it with my own 2 hands is such a joy to me.  It is difficult to even put it into words. A big thank you to all of you that support handmade artists and crafters this Christmas season.
Please visit the Weekend Boutique at Pretty Organized Palace for more handmade gift ideas!

LinkWithin

Related Posts Plugin for WordPress, Blogger...